By ‘soft’, I mean a Shore hardness of 55A to75A, which is softer than the standard eSun eFlex TPU87A.
Warning: This post is based on personal experience and is not a comprehensive guide. It may inspire you, but no guarantees are provided.
Motivation
The original motivation is to make a cushion for a helmet. Though I can’t provide any info about the model of the cushion or the helmet, some cropped photos can be shown.
But it’s fun to have the capability to print very soft materials at home.
Basic info
The specific material brand is 易泰龙. I tried 55A to 75A, and the experience is similar.
The printer I used for the task is Creality K1C, which features a direct drive extruder.
Hardware
Nozzle diameter: 0.8mm. Using a larger nozzle diameter helps speed up the printing and reduce the likelihood of jams.
Print bed adhesive: Any type of PVP/PVA glue. I even tried a liquid one. The purpose of using glue is not to enhance adhesion, but rather to make it easier to remove printed part from bed. The PEI sheet tends to be too sticky for TPU.
Filament dryer box: SUNLU S2. Any dryer box can be used. Just make sure the filament is properly dried. You may hear popping noise and observe inconsistent extrusions if the filament is not dried.
Software
I’m using Orca Slicer with the TPU preset profile, but I have modified some options.
Nozzle temperature: 250 degree Celsius. The recommended range is 190-230 degrees. But I opt for a higher temperature to ensure lower viscosity.
Part Cooling Fan: 0% even during loading. The viscosity rise quickly when the temperature drops. The part cooling fan is also set to 0.
Max volumetric speed: 6mm³/s. This is the fastest I can achieve.
Support: Normal, 0 top interface layers, rectilinear grid. The primary concern is ensuring high-quality surface finish on the face that will contact the human body. The other layer, which will be assembled with the helmet, can have a lower quality since adhesive will be used. Given the excellent bonding properties of TPU layers, setting zero top interface layers facilitates easier support removal.
Infill: Concentric. Due to the curve shape of the cushion, I choose concentric for infill. This infill pattern is not as strong as others, which is preferred for a cushion application.
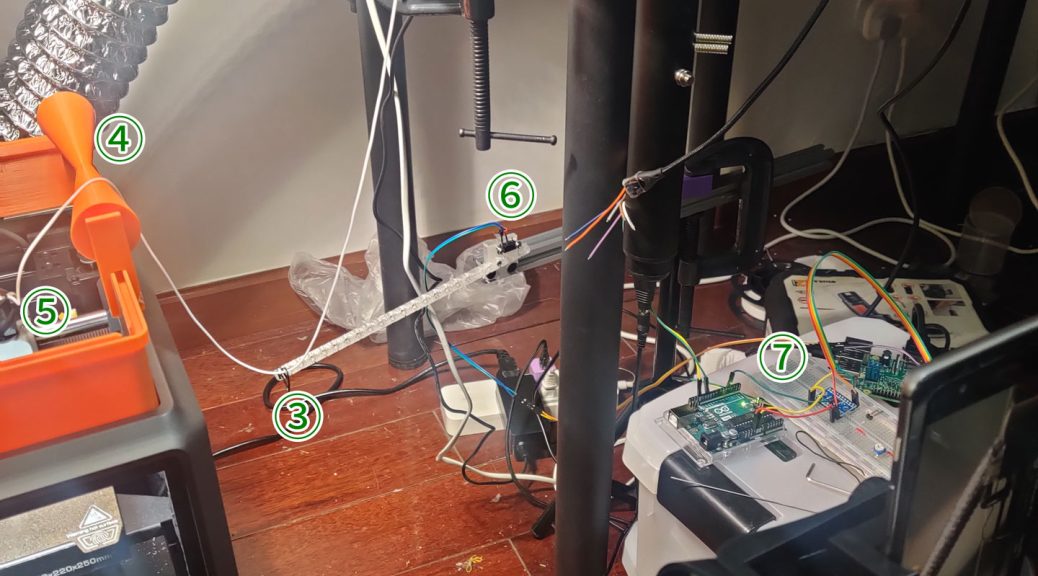
The External Hardware
The filament surface is very smooth, causing significant friction and making it impossible to run through PTFE tube. (The eSun TPU87A has a rough surface, nice job.)
The filament is shipped in a vacuum sealed bag. As a result, the 1kg filament spool is compressed and the strands stick together, requiring the extruder to exert more force to pull filament.
To make matters worse, the filament is soft as advertised. When the extruder attempts to pull the filament, the filament will stretch and become thinner. This results in the extruder gear teeth slip, leading to under-extrusion or no extrusion. To address this problem, I make a contraption to minimize the extruder’s workload as much as possible.
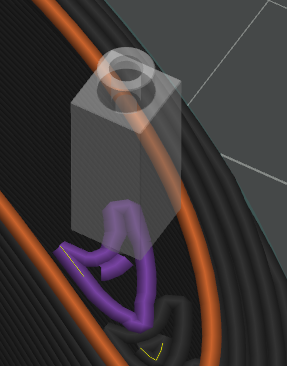
You may want to enlarge the picture to see the details.
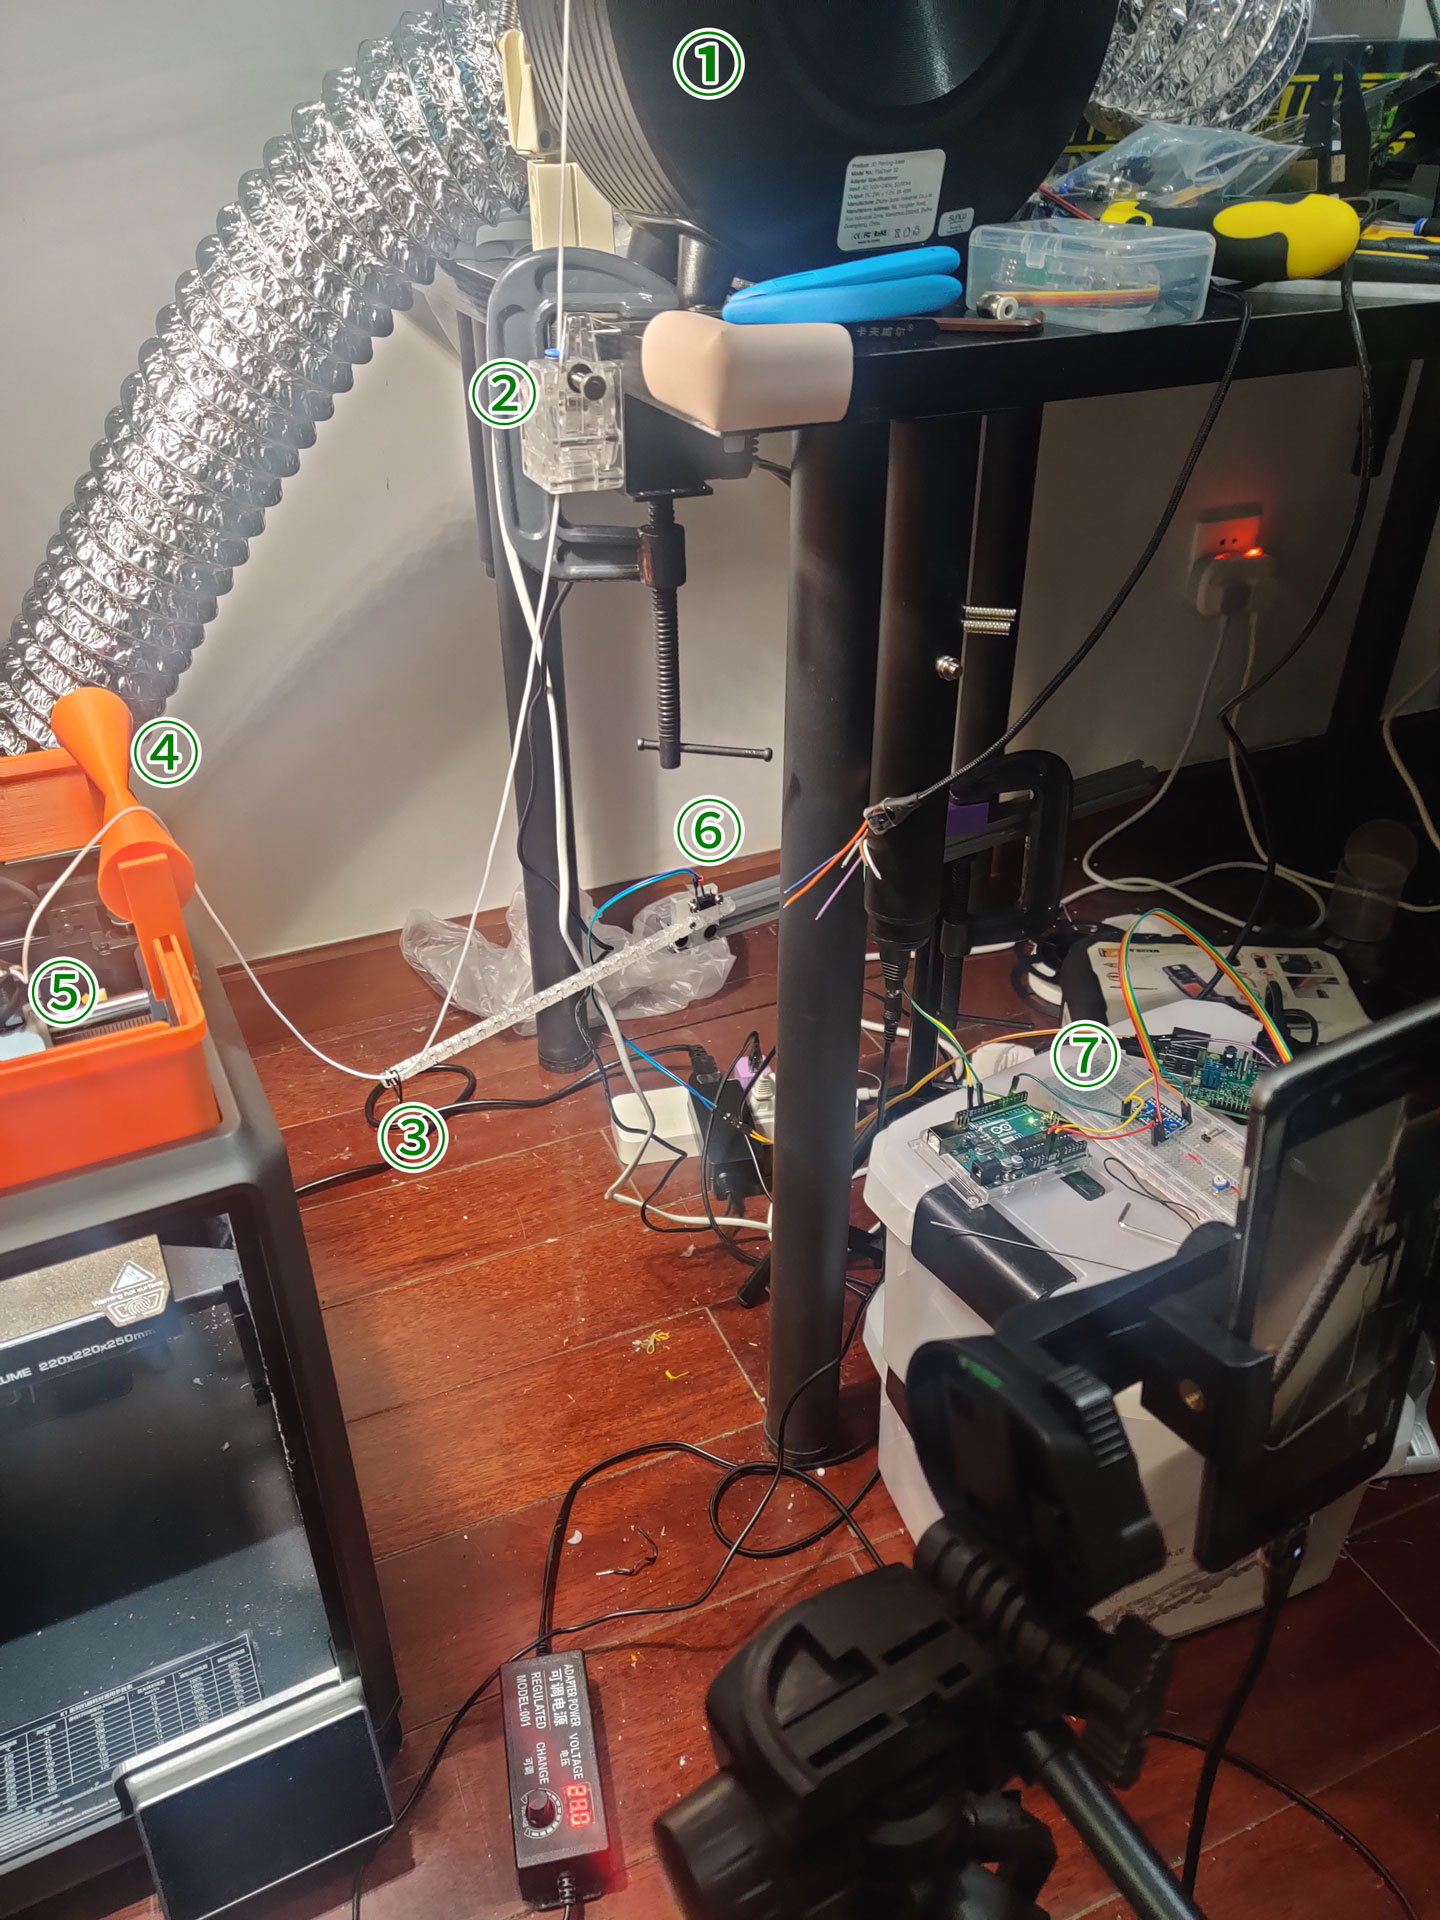
①Filament dryer box
②Extra BMG extruder
③Detection lever
④Guide wheel
⑤The printer extruder
⑥Microswitch
⑦Arduino and Raspberry Pi as controller
The filament is held in the dryer box, run through an external extruder, then a detection lever and guide wheel, to the printer extruder. After printing for a while, the filament will no longer be in a relaxed position, pulling up the left end of the lever. The microswitch on the right end will then be released, and the controller will tell the external extruder to pull some filament out until the filament is relaxed again.
If the lever has not been lifted for a long period or has been kept lifted for a long period, the controller will known there is something wrong and will pause the print process.
The contraption is inspired by https://www.youtube.com/watch?v=BT04glGDjB4&t=437s
Gcode post-processing script
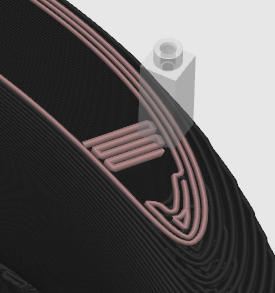
Because I want to print something flexible, the shell is very thin. Therefore, the top interface is difficult to print. The printing order within the same layer also matters.
Look at this layer. The orange line is outer wall, the red line is sparse infill, and the blue line is internal bridge.
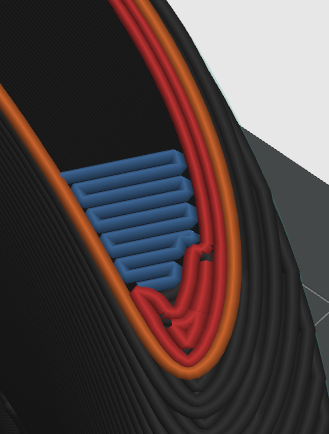
When viewed in this layer. The internal bridge is printed before sparse infill.
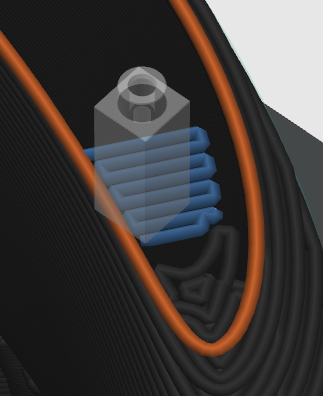
There is actually nothing down below. So the internal bridge is spanning over void, which will cause this part to fall and reduce print quality.
I wrote a small script that modifies the gcode file to make the internal bridge print after sparse infill.
Some internal solid infill is also suffering from the same problem and needs to be fixed.
Troubleshooting
The soft filament is not loading at all: Clean the nozzle using a nozzle cleaning needle to remove any residual filament in the nozzle and throat. After cleaning, the filament should be easily inserted by hand until it reaches the nozzle end.
Jam in extruder: Unfortunately, the Creality K1C extruder does not have a tension adjustment design. So it’s not possible to reduce the clamp force. However there are some general advice to reduce temperature inside the extruder. Replace the yellow piece between step motor and extruder with a washer to create air gap. Reduce the step motor current to decrease heat production. Maybe even consider adding a heat shield/fan for the step motor.
Ref: https://www.reddit.com/r/crealityk1/comments/1bhsn9s/comment/kvfptp1/
Failed to print due to jam. Learn how to resume a failed print. I learned here: https://www.youtube.com/watch?v=-wjE8eDiKWg
Print result
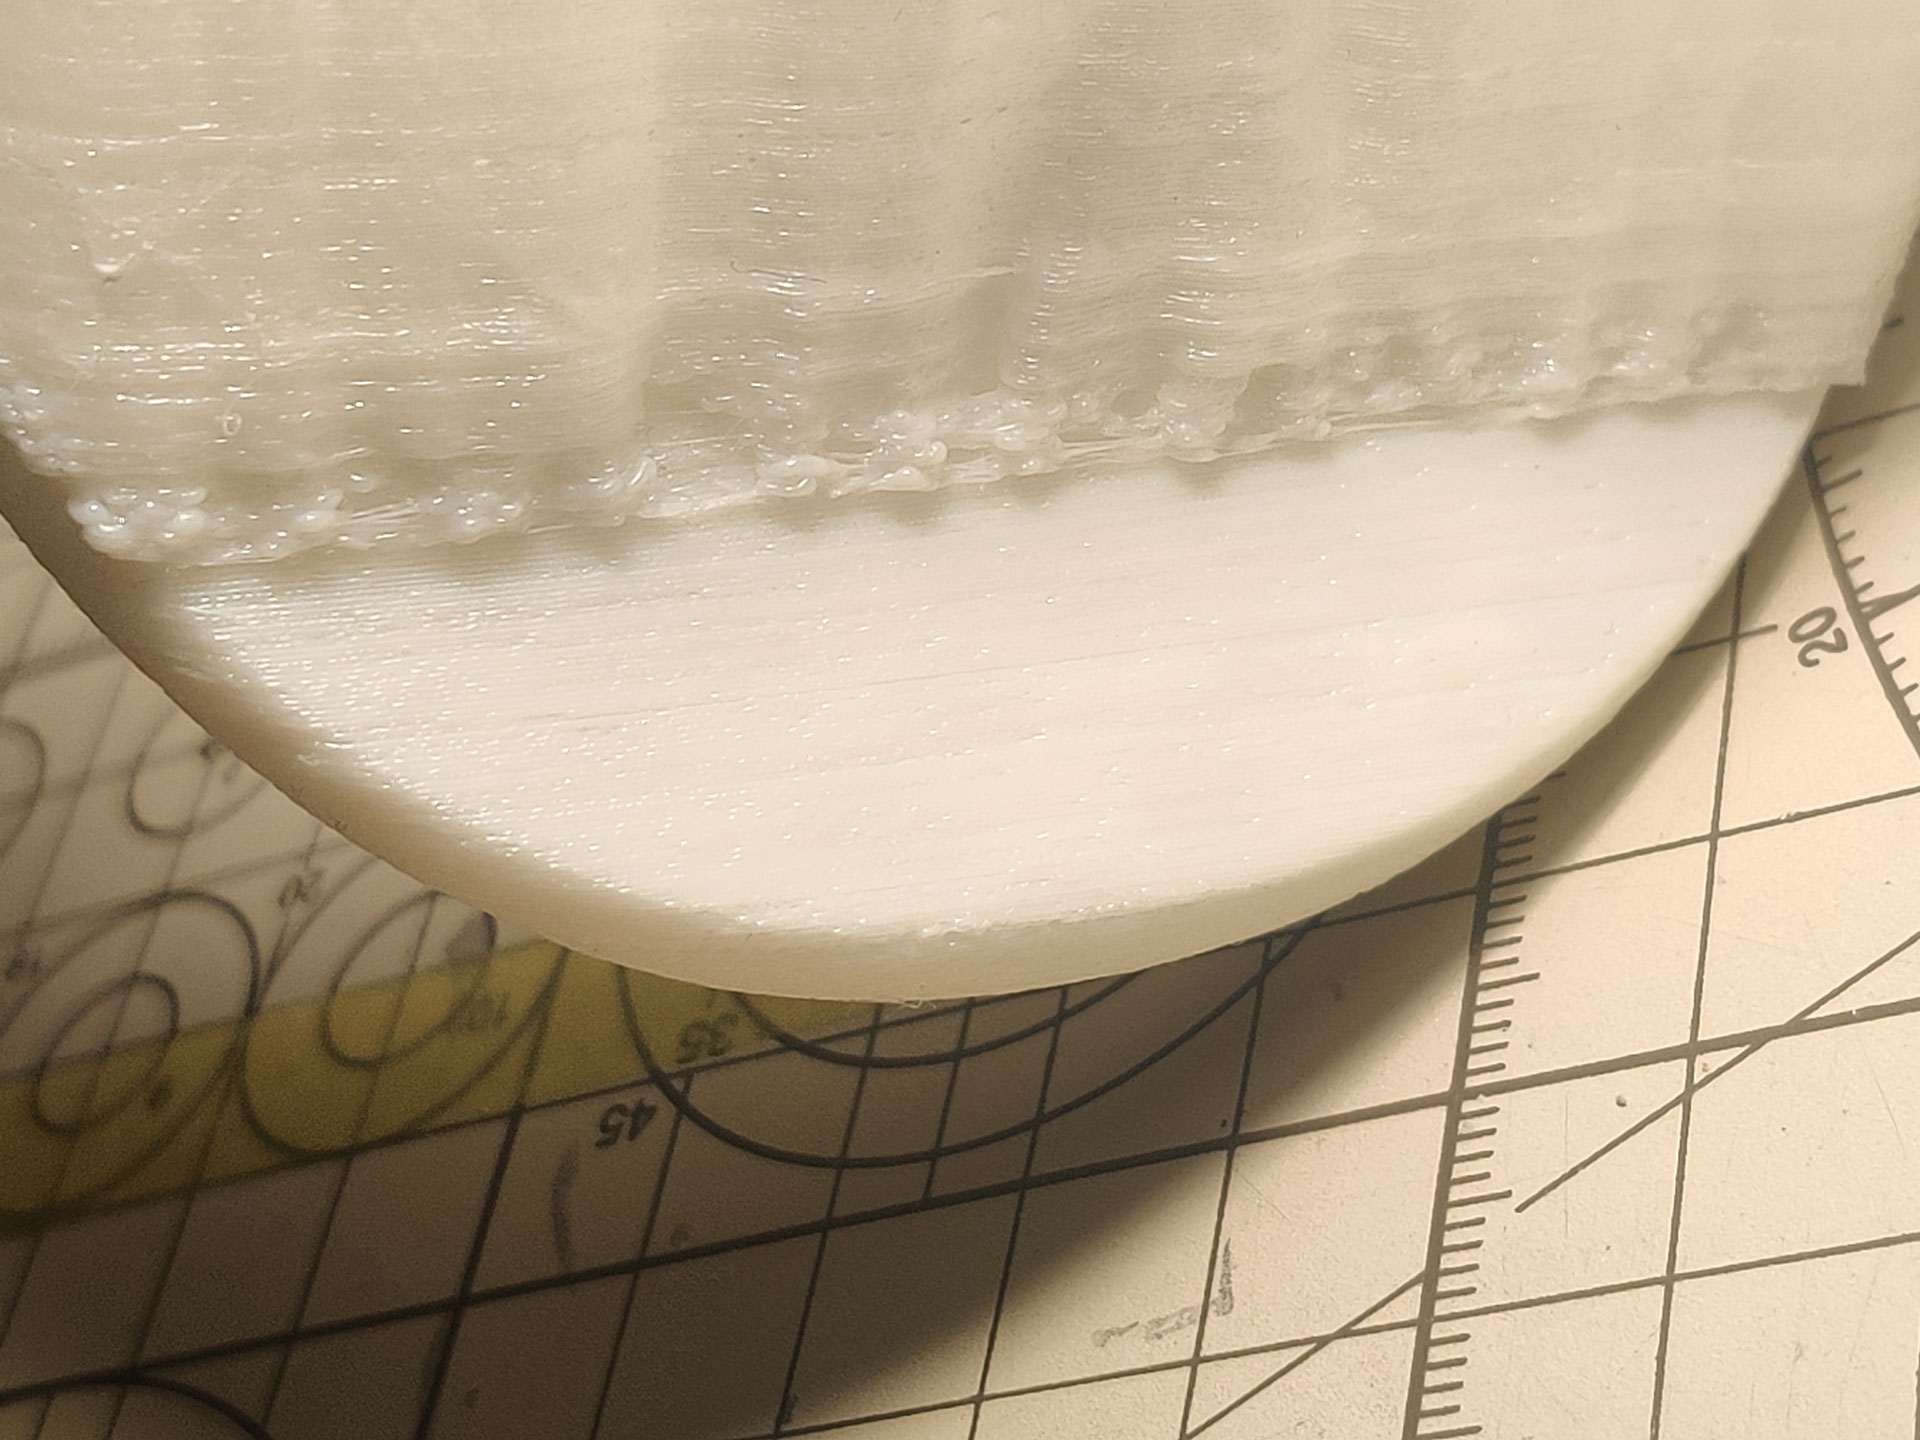
These are the only pictures I can show here. The support had not been tuned then. But surface quality is similar to final result.
Don’t worry, the stringing is attached to the support.

Post processing
The support is not easy to remove. I have to use a No.11 scalpel to separate the support from the main body.
Besides the rough supported surface, there are definitely some stringing and blobs here and there. To smooth or remove them, I use a rotary tool with a burr bit.
Final thoughts
The right way to manufacture this kind of cushion is utilize a 3d printing service. SLS TPU printing can give you a much much better finish, though you have to do some lattice design. I currently don’t possess this ability but I might study it someday.
Print the mold and then fill with silica gel is also an option, but it’s difficult to make complex or hollow structure.
Another reason I chose to print myself is the faster iteration cycle.
Well, the actual reason is: It’s fun.