
我当前主力的看漫画 Android 平板是联想 MIIX 520 上的模拟器. 与正常平板有所不同, 比如长按被 Windows 劫持了.
为了提高 EhViewer 体验, 以及适配我的 Android 设备和我平时的阅读习惯(比如先下载再看, 倒序阅读), 对 EhViewer 进行了部分修改.
由于修改完全依照个人喜好, 暂时无意发起 Pull Request 原 Repo 已 Archive 也发不了 PR 了.
Category Archives: Computer
How many trailing zeros does a factorial have
Simple question: How many trailing zero does 10000! have?
Simple to solve it using python
import math

factorial_answer = str(math.factorial(10000))
print(len(factorial_answer) - len(factorial_answer.rstrip('0')))
Python think about 100ms and tell me the answer is 2499.
This question is name as “Trailing zeros”
https://en.wikipedia.org/wiki/Trailing_zeros
The question become:

So we can just integer divide 10000 by 5 and get 2000, integer divide 2000 by 5 and get 400…. and sum all answers (2000, 400, …) until get 0.
let’s using recursion
def f(r, c=0):
    if r == 0:
        return c
    else:
        return f(r // 5, c + r // 5)


print(f(10000))
The function take two arguments, one for current answer, another for count result.
and make it into one line
f = lambda r, c=0: c if r == 0 else f(r // 5, c + r // 5)
print(f(10000))
Here we assign lambda expression to f and invoke it recursively. However, assign lambda expression is not recommended in PEP8. 不, 这不PEP8. And function f is exposed in namespace. There are ways to make recursive into anonymous lambda function that won’t pollute namespace, as well as make it into really one line.
print((lambda a: lambda r, c = 0: a(a, r, c))(lambda s, r, c: c if r == 0 else s(s, r // 5, c + r // 5))(10000))
Another flaw is, we use same division twice, more precisely, “r // 5” twice.
To eliminate duplicate, closure may help.
def f(r):
    def _f(r):
        while r != 0:
            r //= 5
            yield r

    return sum(_f(r))


print(f(10000))
The process become, constantly dividing number by 5 and yield it to sum, until zero.
Make a function for that “continuously do something and yield it, until some condition” operation
def repeat_w_func(initial_input, repeat_func=None, yield_input=False, end_func=None):
    """
    constantly do calculate function and take output as next time input
    :param initial_input: the initial input
    :param repeat_func: the function that will be evaluate repeatedly
    if not set, the function behavior like itertools.repeat(initial_input)
    :param yield_input: if set to True, initial_input will be yield once before yielding repeat_func output
    :param end_func: the function that will end the loop and stop yielding. if not set, yielding will be endless
    :return: a generator
    """
    result = initial_input
    if yield_input:
        yield result
    if repeat_func:
        while True:
            if end_func:
                if end_func(result):
                    break
            result = repeat_func(result)
            yield result

    else:
        while True:
            yield initial_input
With brand new repeat with function function, we can solve the question elegantly, with help of itertools.takewhile function.
from itertools import takewhile
print(sum(takewhile(lambda x: x != 0, repeat_w_func(10000, lambda x: x // 5))))
Future research
Solve in function programming language like Haskell.
Is there a written functional just work like the repeat_w_func function in python or package?
Install Keras with CUDA on Windows 10 PC
Objective
The objective of this post is guide you use Keras with CUDA on your Windows 10 PC.
Install Dependencies
Hardware: A graphic card from NVIDIA that support CUDA, of course.
Driver: Download and install the latest driver from NVIDIA or your OEM website
CUDA: Download and install version 7.5 from https://developer.nvidia.com/cuda-75-downloads-archive DO NOT install outdated driver intergrated in installer. Visual Studio integration and GPU Deployment Kit is not needed.
cuDNN: Download and copy all folder (there should be three: “bin”, “include”, “lib”) in zipped cuda folder to your CUDA installation folder (there should be “bin”, “include”, “lib”) https://developer.nvidia.com/cudnn You may need to register as an NVIDIA Accelerated Computing Developer Program member to process to download.
Python: Download and install Anaconda 2 from https://www.continuum.io/downloads Run conda install mingw libpython after installation.
Visual Studio: Install version 2010, 2012, or 2013. Newer version is not supported. The free community version is fine. We just need the compiler.
Microsoft Visual C++ Compiler for Python 2.7: Download and install from http://www.microsoft.com/en-us/download/details.aspx?id=44266
GCC: Download and install TDM-GCC from http://tdm-gcc.tdragon.net/
Install Theano and Keras
Keras support Theano or Tensor Flow as backend. However, Tensor Flow with GPU is not support in Windows. So just use Theano as backend.
Just install as a common package of python
pip install theano keras
Configuring Theano
Write a plain text file named .theanorc (or .theanorc.txt if previous one is hard to create)in your user folder(C:\Users\<Your username here>\)
Contents is as following
[global]
floatX = float32
device = gpu

[nvcc]
flags=-LC:\Apps\Anaconda2
compiler_bindir=C:\Program Files (x86)\Microsoft Visual Studio 12.0\VC\bin

[dnn]
enabled = True

[lib]
cnmem=0.75
“device = gpu” means use gpu resource
Replace “C:\Apps\Anaconda2” to your installation path of your Anaconda 2. There is no space between “flags=-L” and the path.
Replace “C:\Program Files (x86)\Microsoft Visual Studio 12.0\VC\bin” to your installation path of Visual Studio. There should be a “cl.exe” at that path.
Replace “cnmem=0.75” to your free graphic card memory ratio. You may use GPU-Z from https://www.techpowerup.com/gpuz/ to determine how much memory can be allocated to Theano besides your normal usage (for screen display, etc.). Theano will eat that much memory (75% of memory in this configuration) when you initialize Theano every time.
Test Theano
Open python console and run import theano
It may be a little slow, but eventually it will print something like
Using gpu device 0: <Your GPU> (CNMeM is enabled with initial size: <Your cnmem ratio> of memory, cuDNN <numbers, whatever>)
Stop python console if it looks fine.
Configuring Keras
To manually assign Theano backend, change following lines in C:\Users\<Your username here>\.keras\keras.json
{
    "image_dim_ordering": "tf",
    "epsilon": 1e-07,
    "floatx": "float32",
    "backend": "theano"
}
Replace "image_dim_ordering": "tf", to "image_dim_ordering": "th", to use Theano’s image channel order(BGR).
Replace "backend": "tensorflow" to "backend": "theano" to assign Theano as backend.
Test Keras
Just run the example from official repositry https://github.com/fchollet/keras/blob/master/examples/imdb_cnn.py
Wait and you will know if it works well. You may also watch GPU-Z to know how many GPU resource is been used.
Conclusion
Now you get a fully workable Keras instance with CUDA acceleration.
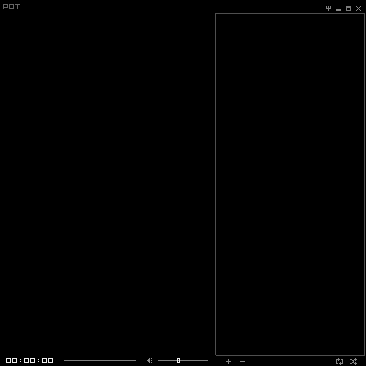
PotPlayer Mini Skin Fixed for version 1.6.59347
After an update of PotPlayer, the older mini skin seems stopped working. Only a windows style border w/ title bar are shown with no control components nor progress bar. But modified mini skin on DA still working. So I wonder what’s the difference.
Analysis: PotPlayer skin file has ‘.dsf’ extension. Opening in hex editor, it has file head of “PK”. Obviously it’s ZIP. After extracting, it’s “VideoSkin.xml” that define the skin appearance. It seems that “VideoSkin.xml” of the original mini skin is some kind of broken or in wrong format which new version of PotPlayer can’t parse.
Fix: Correct hard-coded string in “VideoSkin.xml” and save as UTF-8(w/o BOM) and re-package into ZIP file.
正则表达式零宽断言
正则表达式里”零宽断言”这个词可能有很多不同的说法, 比如环视, 正向匹配, 反向匹配, 零宽度负预测先行断言…
Continue reading 正则表达式零宽断言
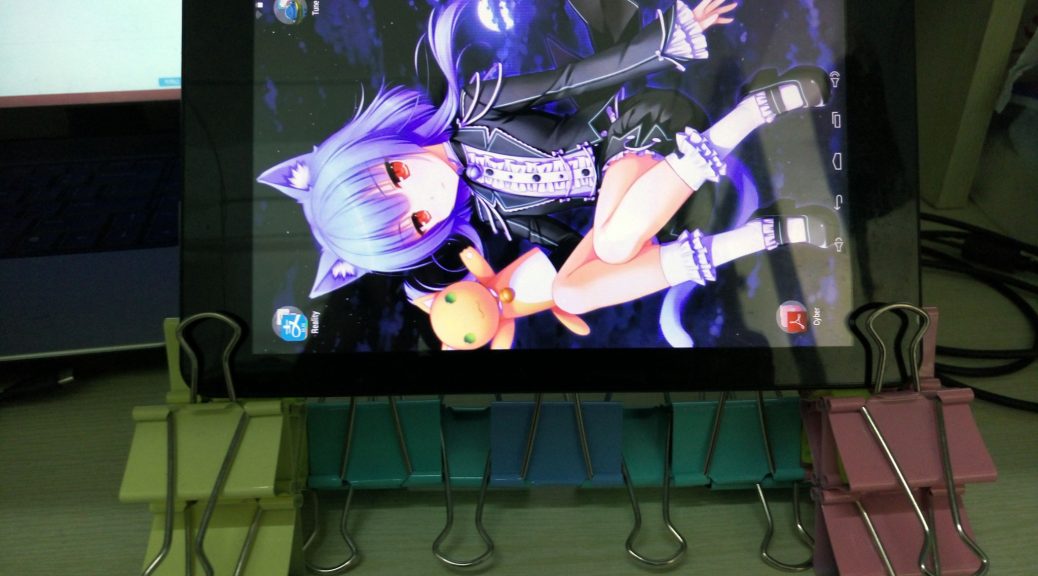
自制平板支架
材料: 长尾票夹*n, 捆扎条*2
少废话多发图
Continue reading 自制平板支架

酷比魔方iwork8折腾记

暖暖环游世界 换装研究
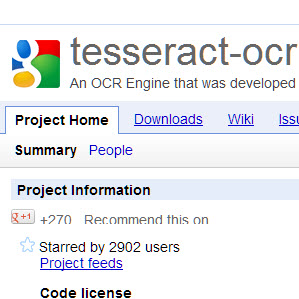
Tesseract-OCR的训练
之前按照各路教程教程来训练Tesseract, 遇到了各种错误, 今天终于训练成功.
一定要注意看官方提供的教程– TrainingTesseract3 ! 完全按照步骤做, 不要随便简化!
Continue reading Tesseract-OCR的训练

细胞分裂5玩完了
本文发布于 2011 年 2 月 11 日 11:35

经过十几天的奋斗,细胞分裂算是玩完了,自己通了剧情的Rookie难度和Hunter的Rookie难度,用作弊器通了剧情Normal难度和Realistic难度和Hunter的Realistic难度。但是只得了17150点。现在撰文纪念一下~~~